Sale on canvas prints! Use code ABCXYZ at checkout for a special discount!

I was in the midwest during the middle of February. Living in San Diego, it's easy to forget how cold winter really is....that trip was a quick reminder. One of my goals was to do a shoot of barns. I found my opportunity around the Amana colonies (if you have never been there or heard of it....worth a visit...old German settlements based on concept of a farming commune). The colonies are located along the Iowa River Valley, so there are rolling hills and woods dotted with farms. It was a lot of slushy through mud...and that's a story unto itself. I got what I came for and I like the look I got. The trees were obviously barren, but that adds to the strength of some of the pictures. I am now going through the pictures I took and would like to walk you through the process I go through to create my art.
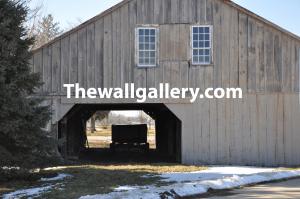
Step one: I sort through all of my pictures for the best shots....I usually take 2 to 3 shots of the same thing. From those 2 to 3 (assuming I like what I took), I weed it down to 1. That picture gets a hard look for "framing the shot" . Maybe it's just me, but it seems like I always have subjects just ever so slightly tilted...I must stand crooked?? �Anyway, I then crop and adjust accordingly...the samples attached show only a minor adjustment on this shot.....some are more extreme and some no adjustments or cropping are needed. All of that said, this completes the first step and then I put the resulting pictures in a folder for the next step...painting. More on that with this picture as I work through the rest of the batch from the shoot. Stay Tuned!!
Can you see the subtle differences? There wasn't any "tilting" in this one, but I did tighten up the bottom portion and if you look real close a "one way" sign disappears through the barn just above the hay rack.


TheWallGallery.com